
Keto Instant Pot Zuppa Toscana
By using rutabaga instead of potato in this keto Olive Garden copycat Zuppa Toscana recipe, the carb count is cut by about 75%!
Real Recipes for Real Families
By using rutabaga instead of potato in this keto Olive Garden copycat Zuppa Toscana recipe, the carb count is cut by about 75%!

This low-carb, low-calorie keto hot chocolate is also dairy-free thanks to macadamia nut milk! Enjoy your cocoa and stay in your macros.
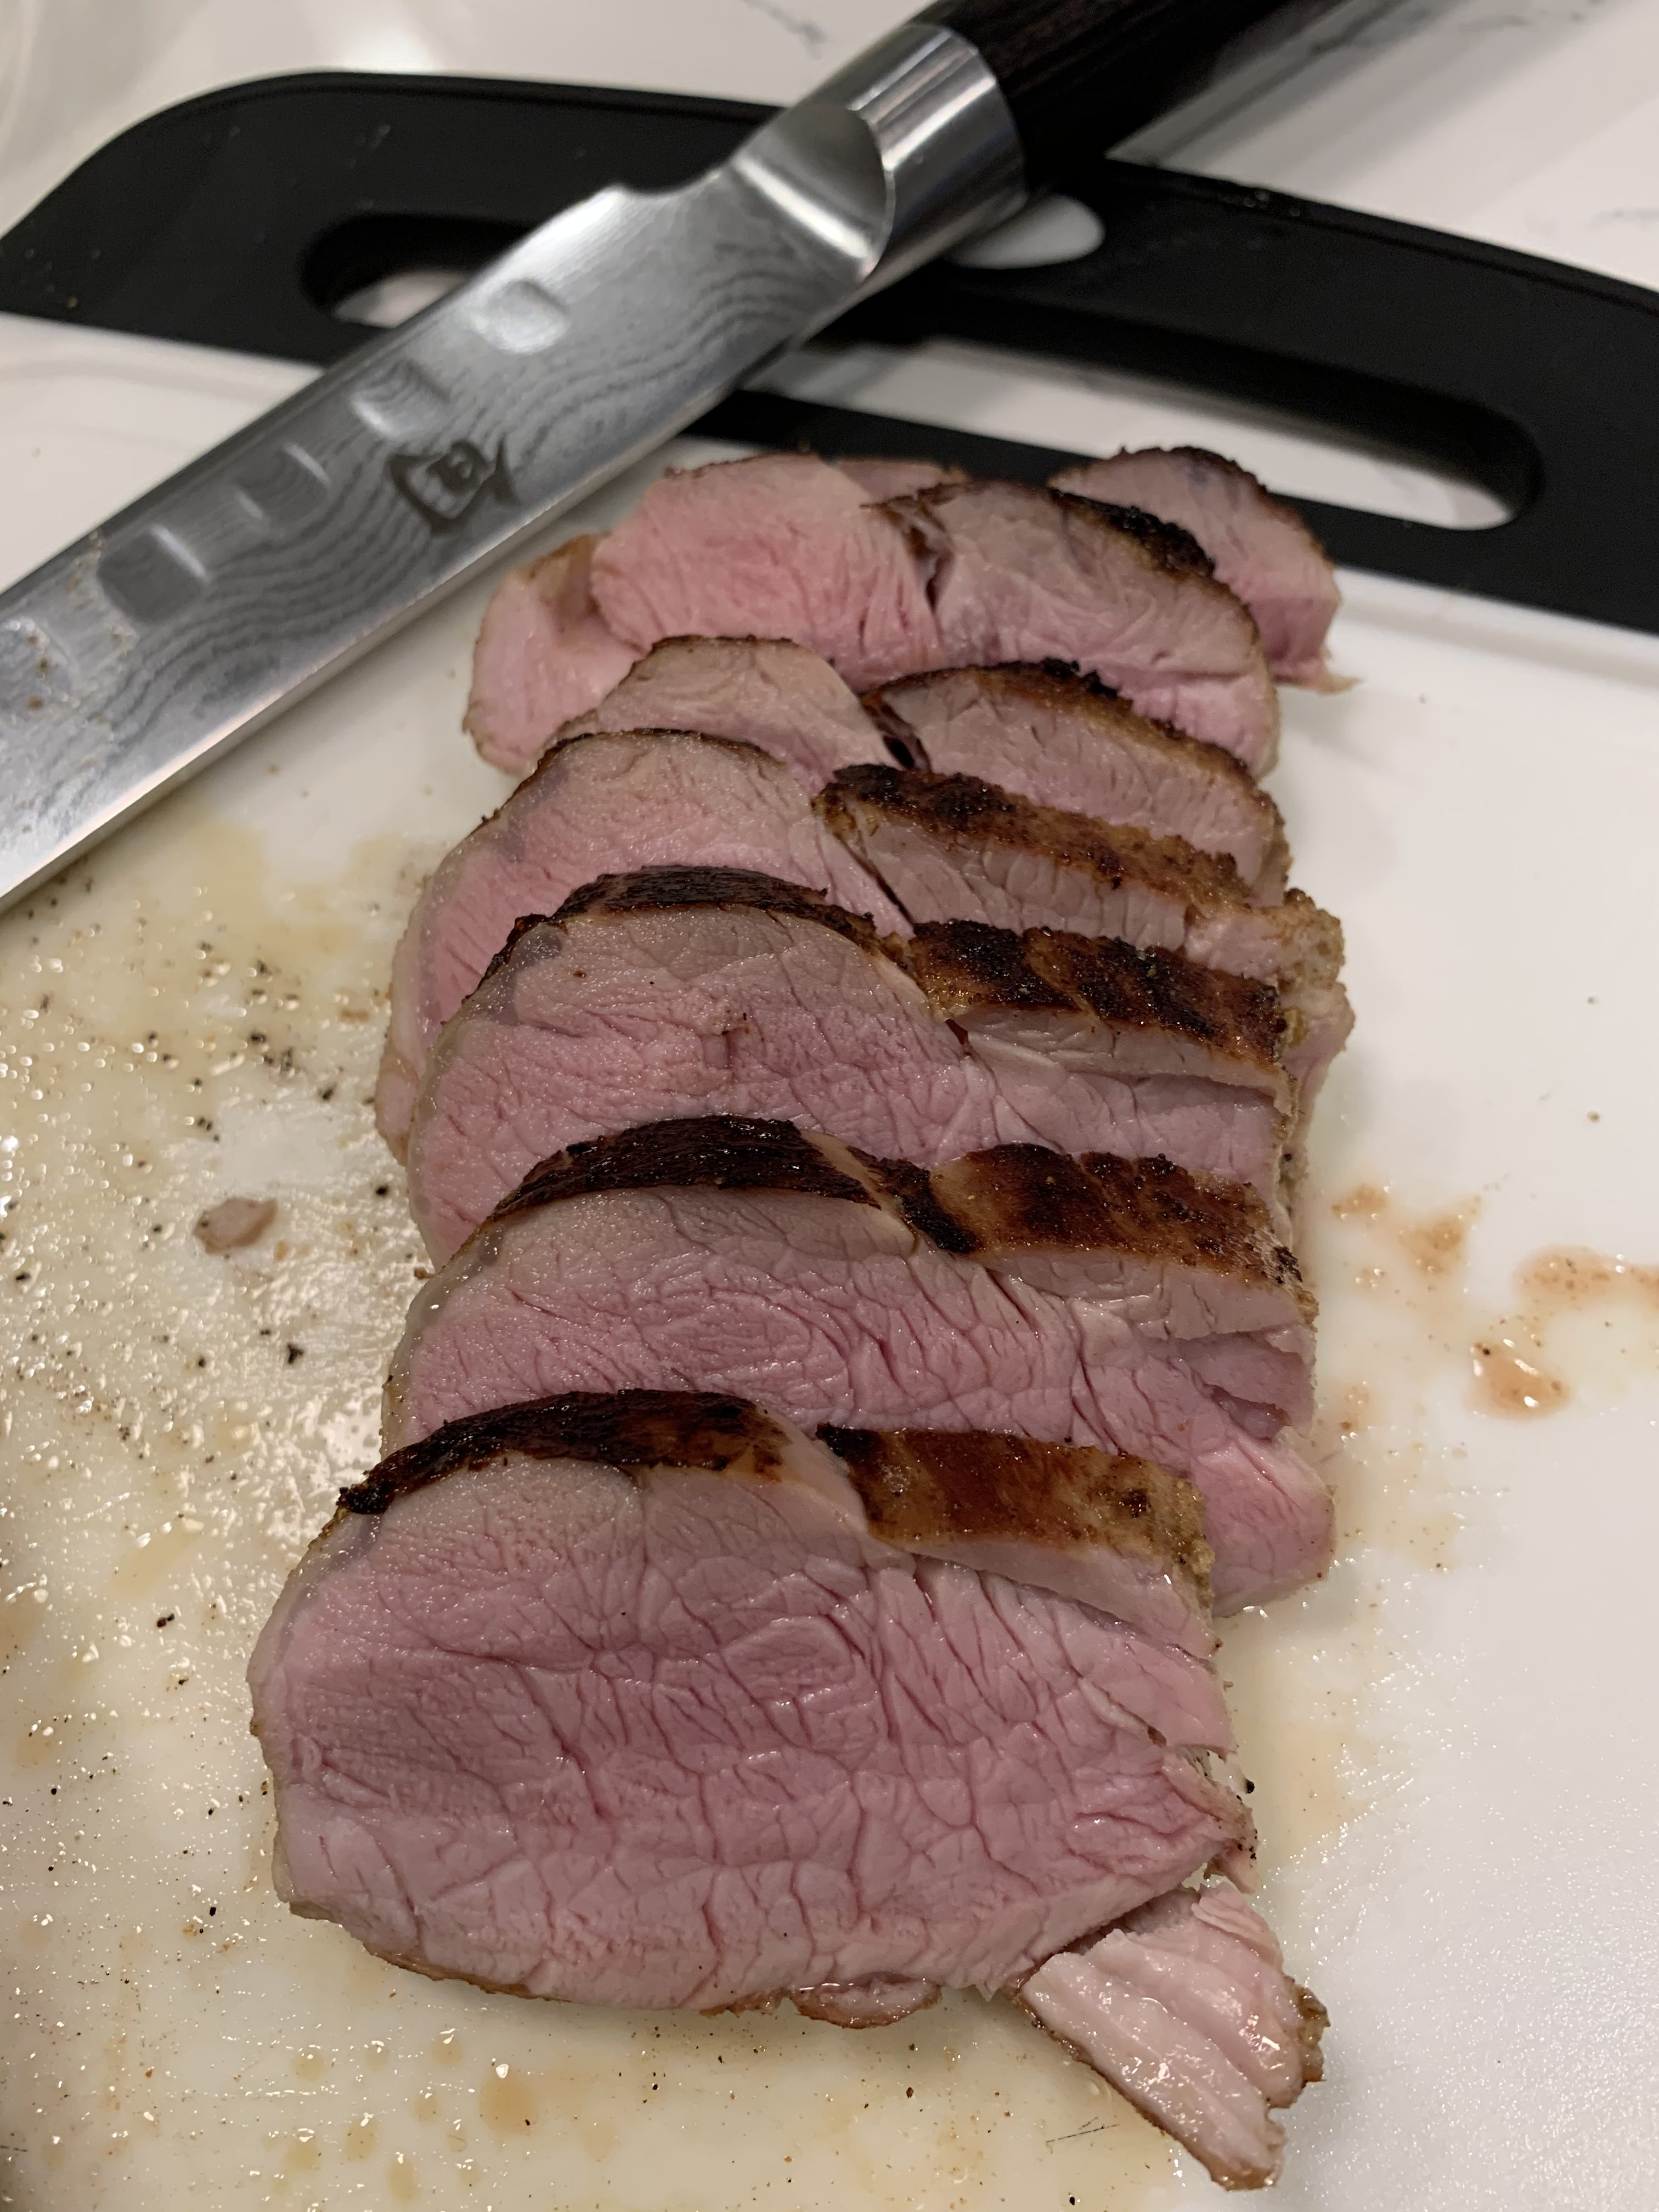
I love cooking sous vide. It’s a really cool concept. You basically vacuum seal something (usually meat) and put it in a water bath that’s kept at a constant temperature. Eventually the meat is the same temperature all the way through, at which point you take it out of the bath and give it a quick sear on the outside to get that nice delicious browning. It makes the meat perfectly cooked without any guesswork.
For this recipe, I started by wanting to make a Cuban sandwich, so I needed some roast pork for the base. I’ll post the recipe for the sandwich next, of course, because it turned out awesome. I did the whole thing under a bit of a time crunch, so I didn’t have time to fully marinate the meat. Thankfully, I came up with a great alternative option, which was to make a paste out of the spices and liquid, so a little bit of the flavor of what would have been in the marinade got into the meat as it cooked. It worked beautifully!
First of all, you’ll need a vacuum sealer and a sous vide device of some sort. The gold standard of food sealers is the FoodSaver. Don’t get the cheapest one, as it has terrible reviews. This one is the best-reviewed of the bunch, but if the price tag freaks you out a bit, there’s always a decent one on sale at Costco if you have a membership. You’ll also need a sous vide cooker. I have the Sous Vide Supreme Demi, which I got as a gift, but I have friends who swear by the Anova, and you can’t argue with that price tag.
Start out by setting your sous vide to 140 degrees Fahrenheit (60 Celsius). I used two small pork tenderloins, which turned out to be just shy of two pounds total of meat. Throw those into a vacuum seal bag. In a small bowl, mix together two tablespoons of cumin, a tablespoon of oregano, two teaspoons of salt, and a teaspoon each of garlic powder and onion powder. Also add however much black pepper you want. When you have all that mixed together, whisk in two tablespoons of orange juice and one tablespoon of lime juice. You should end up with a paste. Put it in the bag with the pork and massage it around to make sure it coats them evenly, then seal the bag using the “Moist” setting so the liquid all stays in the bag. Submerge them in the sous vide and let them stay in there for four hours.
When you remove them from the bag, pat them dry and discard any remaining juices. Heat two tablespoons of avocado oil over high heat in an enameled cast iron skillet, and sear the pork for about two minutes per side. To serve, slice it thinly. While I used this in a sandwich, it would also be great over mashed cauliflower with a veggie side. This is a great meal for your non-keto family to eat as well, as it’s fairly lean and would be great with some quick beans and rice and pineapple.

As an Amazon Associate I earn from qualifying purchases. Any embedded link to a product earns me a portion of the purchase price if you click and buy it.

All the flavors of a Reuben sandwich from your favorite deli, in breakfast form! This make-ahead reuben frittata is a great low-calorie breakfast treat.
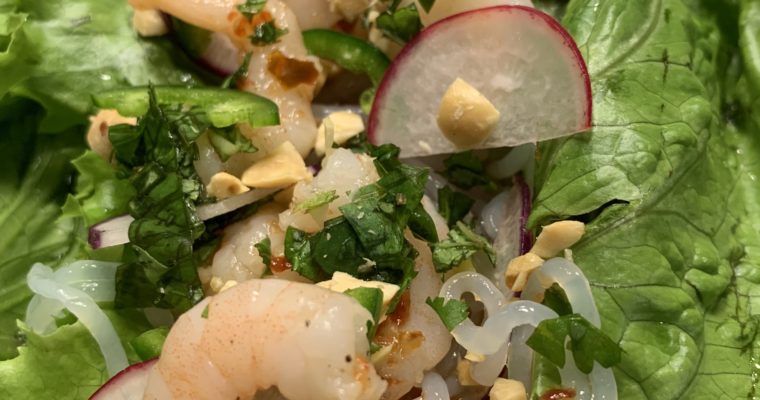
These fresh and spicy Vietnamese shrimp lettuce wraps involve minimal cooking and are a perfect meal or appetizer for a hot summer day!
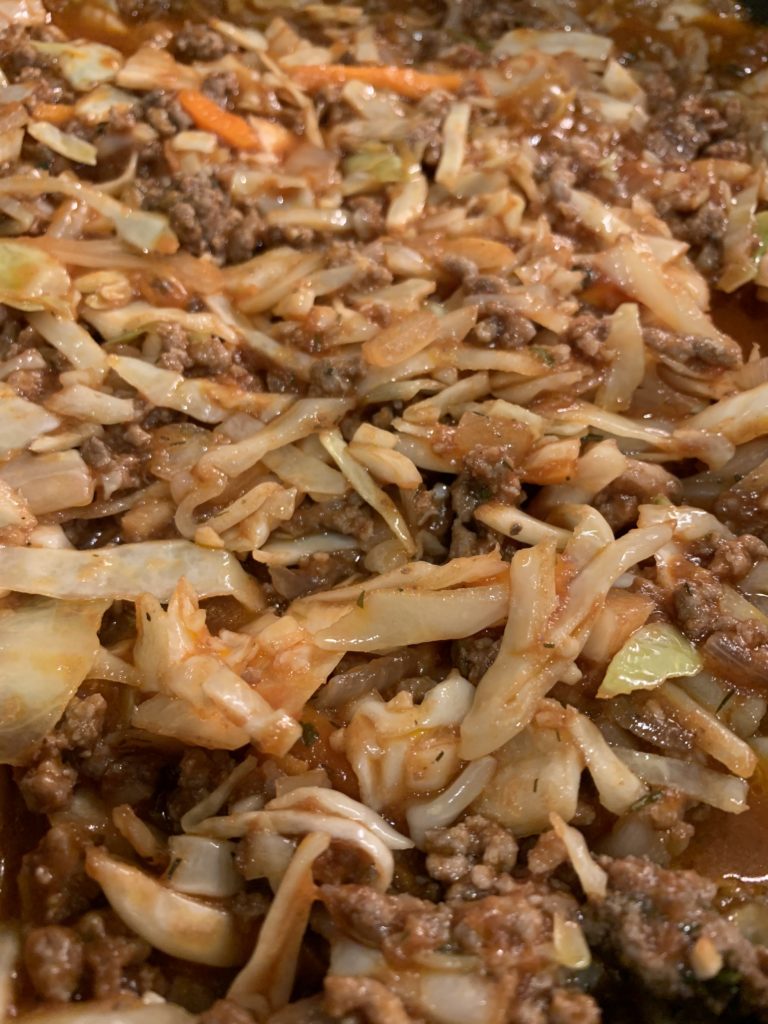
Ever accidentally buy more than what you need of something and then have to scramble to figure out what to do with the stuff you didn’t use? This recipe is borne from me smoking some ribs on Labor Day, buying a couple of bags of coleslaw mix, and then only using one bag for coleslaw. Oops. Cue the panic that comes from potentially wasting perfectly good food. Thankfully, this week ground beef was on sale, so I decided to try to make all this into a one-pot meal-prep dish that tastes like cabbage rolls without the extra carbs you get from the rice filler.
This is still a fairly carb-heavy meal, thanks to the tomato sauce and paste. I prefer a really low-carb breakfast, so it ends up averaging out in the end. Today’s breakfast, for example, was only 4 net carbs, so adding the 9 net carbs you get from this recipe still gives you 7-12 for dinner and snacks, depending on where you like to aim. I’m a 25 net carbs a day kind of girl, so I feel like I have plenty of wiggle room left in my day after eating this for lunch. If you want to cut the carbs a bit, getting rid of the chopped onion will get rid of 1 net carb per serving. Just replace it with a teaspoon or so of onion powder. If you also replace the garlic with garlic powder and leave out the tomato paste entirely, it’ll take off two.
To make this, start with a pound and a half of ground beef. I usually like to use 85% lean, because I think that 80% ends up being too watery once it’s cooked, and anything higher than 85% doesn’t give me the fat macros I need. Chop a medium onion, which will yield about 3/4 cup. Heat a large Dutch oven or saucepot over medium-high heat, then add the beef and onion, along with a teaspoon and a half of salt, a tablespoon of minced garlic, and a teaspoon each of paprika, dried dill, and dried parsley. Use black pepper to taste. Brown the beef, breaking it up as it cooks. Once it’s brown, the onion should also be turning translucent. This should take about 6-8 minutes total.
When the beef is browned, add a 1-pound bag of coleslaw mix and stir it to mix in the beef. At this point, add a 14.5 ounce can of tomato sauce, and a tablespoon of tomato paste. Mix it around until there are no more clumps of tomato paste. Bring the mixture to a boil, turn it down to a simmer, and allow to simmer for at least 10 minutes, or until the cabbage is softened. Add additional salt and pepper to taste at this point. I used another teaspoon of salt, but your taste buds may differ.


As an Amazon Associate I earn from qualifying purchases. Any embedded link to a product earns me a portion of the purchase price if you click and buy it.

A versatile three-cheese sauce that’s perfect for topping your favorite keto-friendly pasta, or just about anything else!

A keto copycat of the McDonald’s McGriddle, using a variation of the infamous “chaffle” recipe as the bread. An addictive blend of sweet and savory!
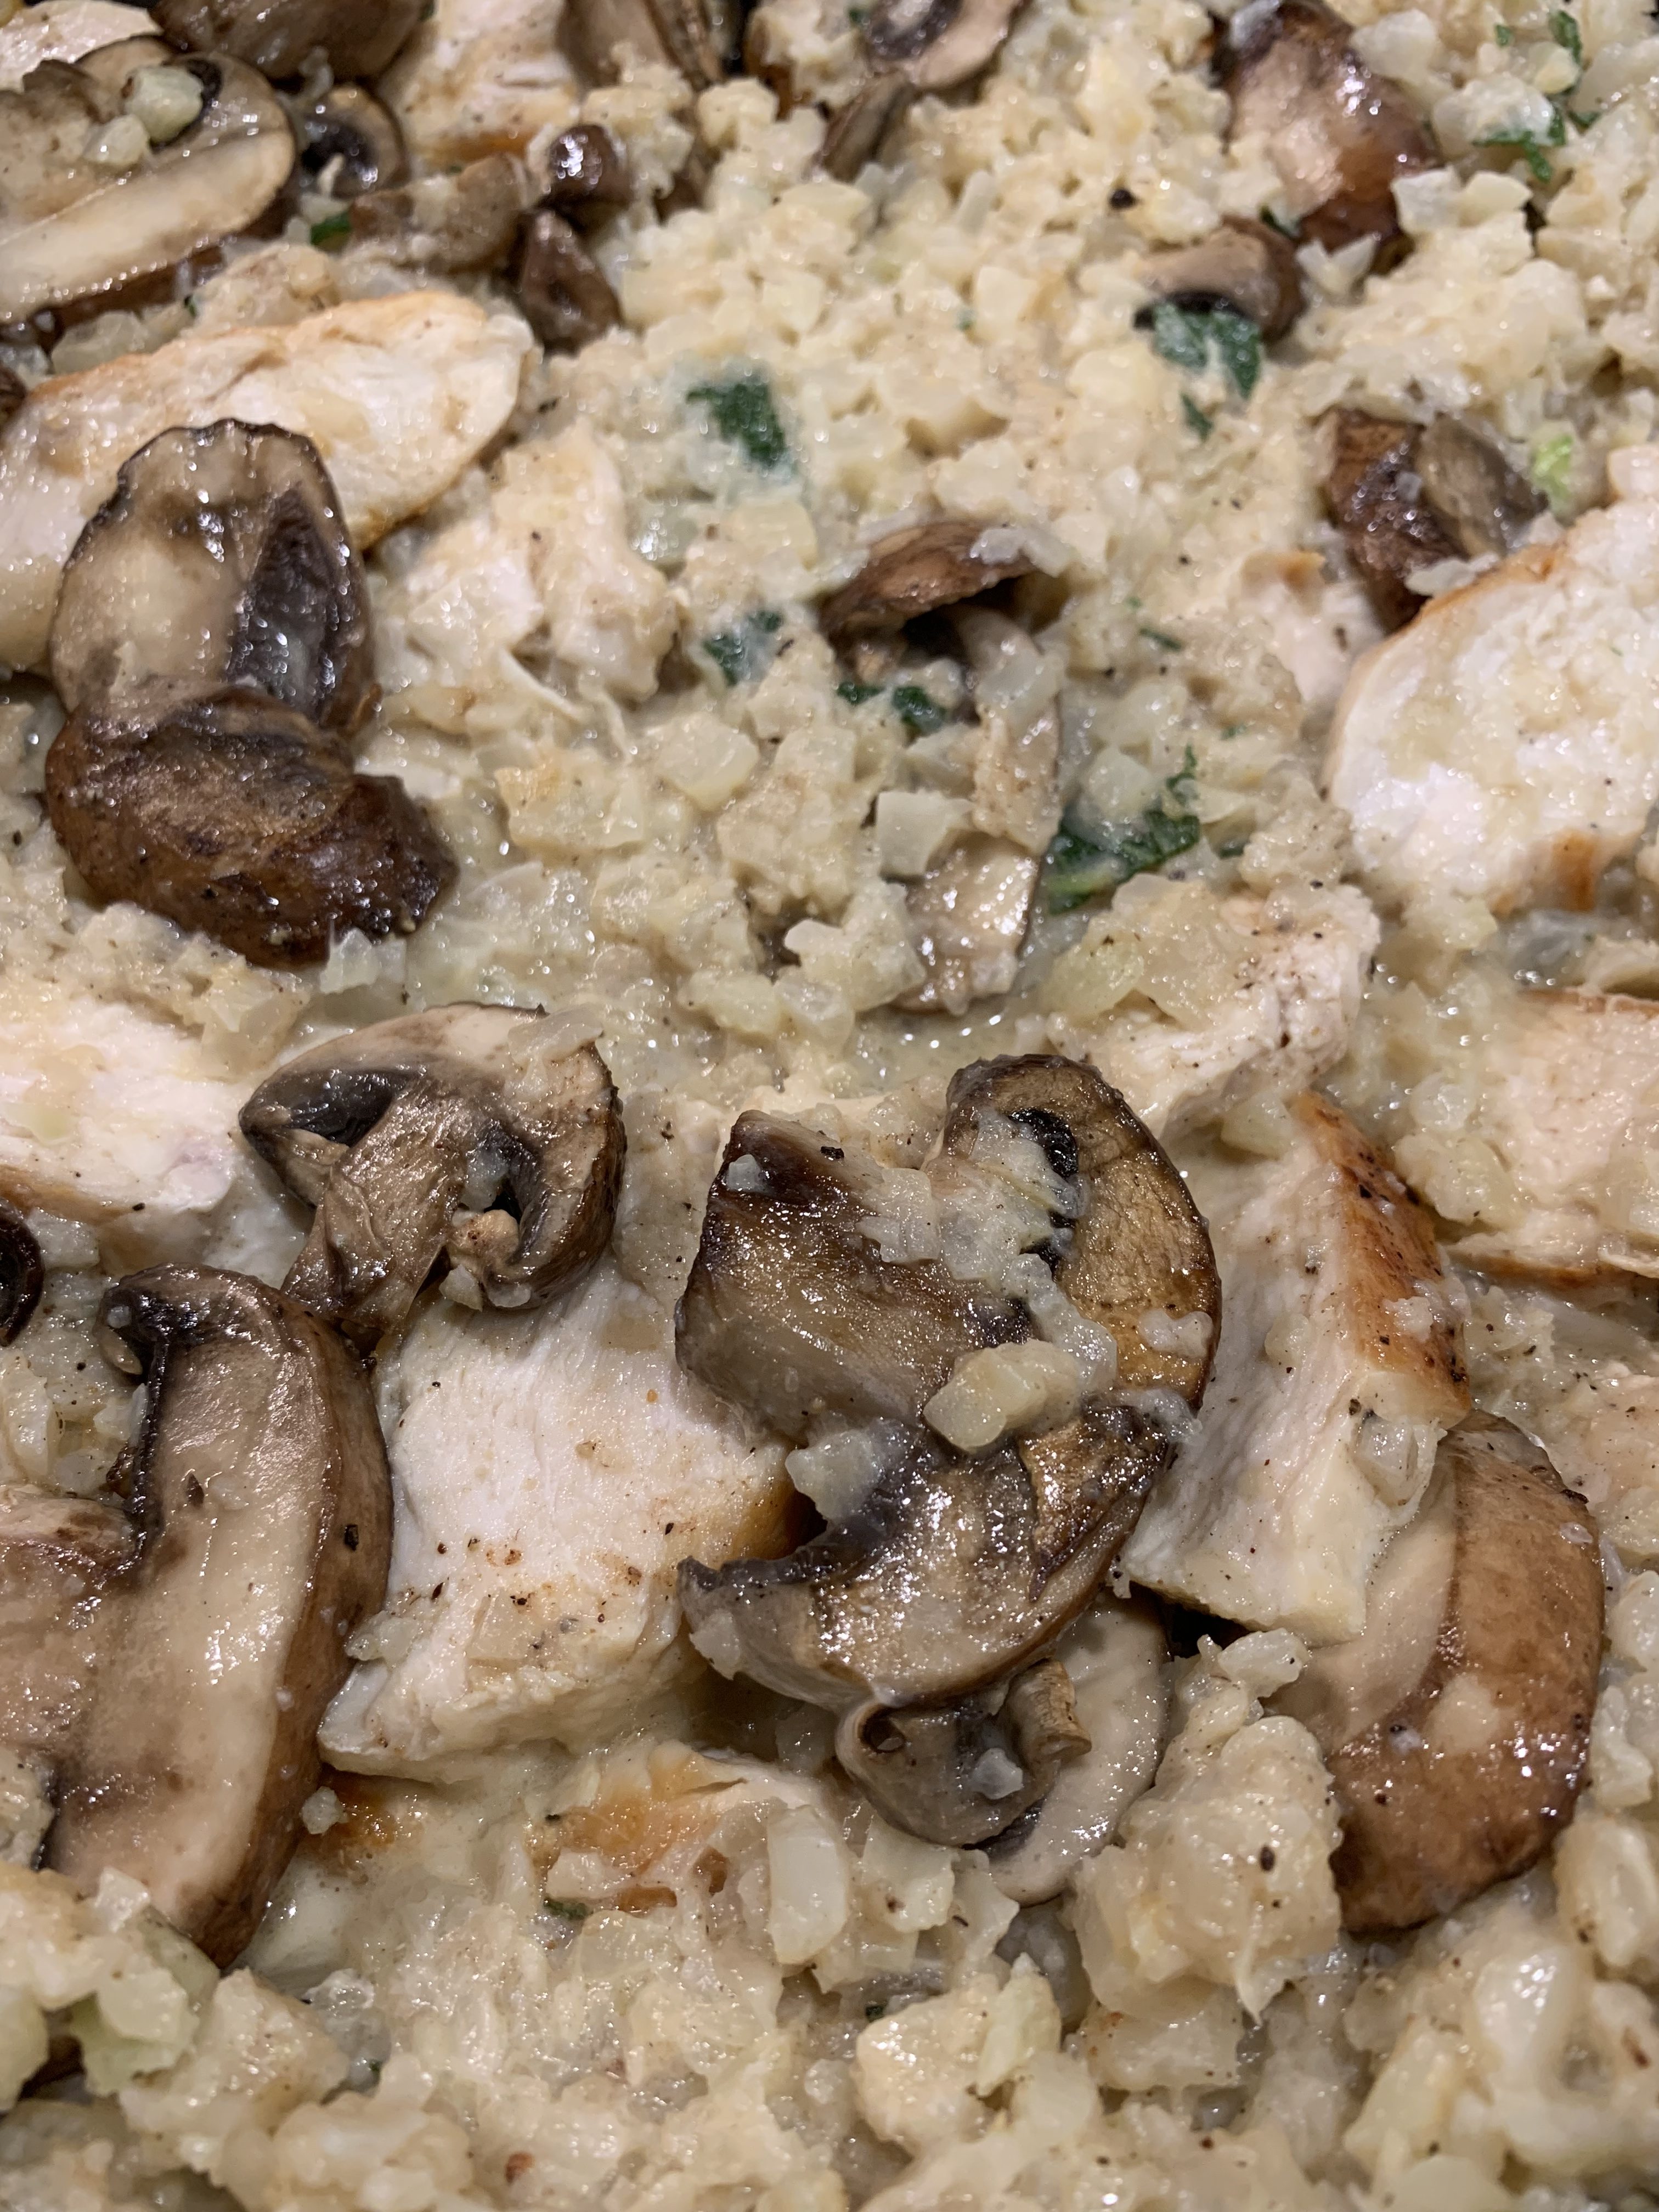
I’ll make an admission first off. This wasn’t meant to be a browned butter recipe. But I started the butter and oil in the pot, got the chicken cooking in a skillet, and then went outside to my garden to pick some raspberries and tomatoes and some sage for this recipe. When I got back, the butter was browned. Oops. But I figured it would be tasty, so I went with it. Sometimes in life you get a happy accident.
I love risotto. It’s one of my favorite things to order in Italian restaurants, mainly because I’ve been gluten free for so long that I can’t get most anything else. But still, risotto is delicious. And it’s really versatile, because you can throw almost anything you have in the fridge into it and it’ll still taste good. Is cauliflower risotto as good as regular risotto? Of course not. You’re not going to get that creamy starchy goodness that you get from the short-grain rice slowly cooking. But the cauliflower version is much easier to make, so it’s got that going for it, which is nice.
For a lot of recipes that call for riced cauliflower, I’ll use frozen, because it’s so much easier. For this one, though, you’ll need fresh, because it cooks for a while and it’ll turn into complete mush by the time everything is finished. My grocery store has recently started carrying 1-pound bags of pre-riced fresh cauliflower, which is awesome because I absolutely hate doing it myself. It makes a complete mess of my kitchen and gets everywhere no matter how hard you try to avoid it. So the base of this recipe is 2 pounds of riced fresh cauliflower. Buy it pre-riced if you can, otherwise godspeed.
You’ll need two separate pans for this recipe: a non-stick skillet and a large saucepot or Dutch oven. Use some cooking spray on the non-stick skillet–I use this avocado oil one that I get from Costco. For the pot, you’ll want to add two tablespoons of olive oil and two tablespoons of butter. Heat both the skillet and the pot over medium-high heat. While they’re heating, sprinkle two chicken breasts with salt and pepper and mince one shallot. Mince enough sage leaves to make 1/4 cup, then set those aside. Put the chicken in the skillet and get it started cooking. Wait for the butter in the pot to start to brown before you start cooking the shallots. Make sure the butter doesn’t smoke–if it does, you’ve cooked it too much. Cook the shallots for about three minutes, then add your cauliflower and toss it to distribute the butter.
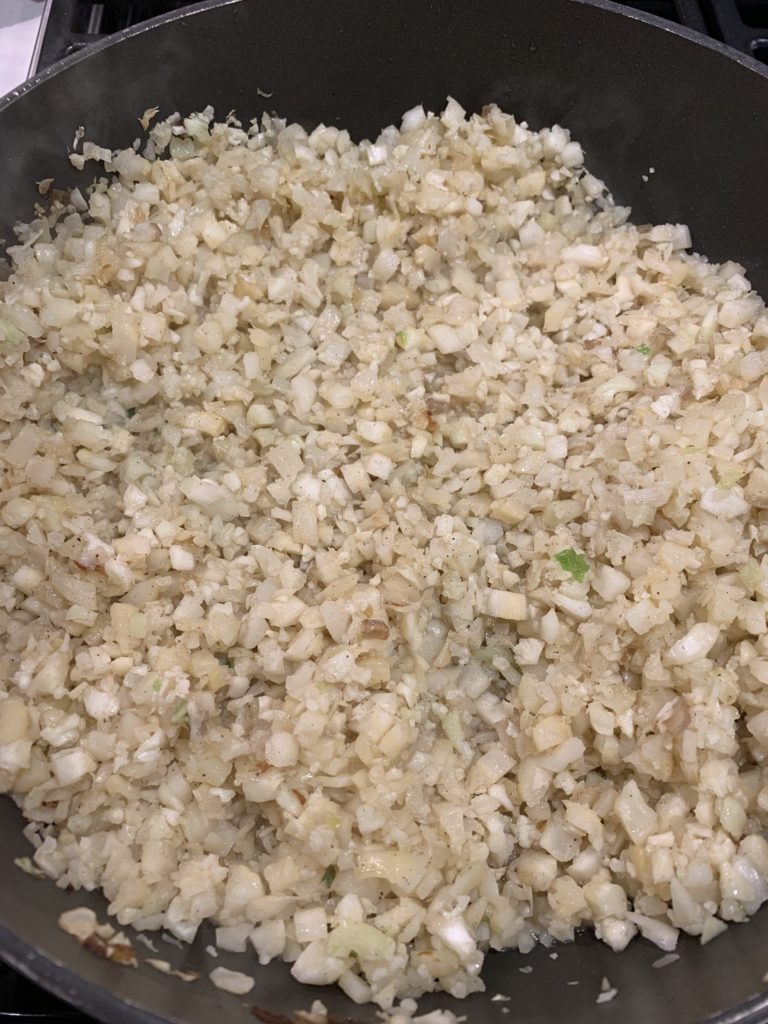
Keep an eye on your chicken while you’re doing all this. Depending on thickness, it should take about 6-8 minutes per side to be cooked through. After the cauliflower is coated in the butter and oil mixture, pour in a cup of chicken broth and stir frequently until most of the broth has evaporated. By this point your chicken should be done, so remove it from the pan and let it rest on a cutting board. Add 8 ounces of sliced baby bella mushrooms to the pan in a single layer and sprinkle them with kosher salt to taste. I used two good pinches.
While the mushrooms cook, pour a half cup of cream into the cauliflower and add a cup of grated parmesan cheese. You want the real stuff for this, not the canned shelf-stable variety. Keep stirring and add the sage. When most of the liquid has evaporated and the cauliflower rice has a creamy texture, add a tablespoon of kosher salt (you read that right–cauliflower needs a lot of salt) and 1/2 teaspoon of nutmeg. Turn the heat down to low, slice the chicken breasts, and stir them and the cooked mushrooms into the pot. Add black pepper to taste and serve, or put into meal prep containers. This reheats really well in the microwave.

As an Amazon Associate I earn from qualifying purchases. Any embedded link to a product earns me a portion of the purchase price if you click and buy it.
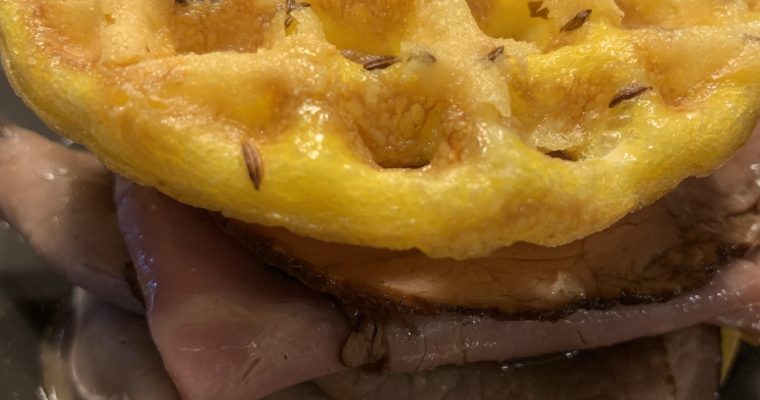
The beef on weck, a Buffalo classic roast beef sandwich, has been given a keto makeover with a chaffle kimmelweck roll!
Recent Comments